How to Source Tight Tolerance Machined Parts in the US
Have you had lackluster experiences ordering precision CNC machined prototype or low-volume production parts from online manufacturing marketplaces or other machine shops?
While standard tolerances of +/- 0.005” (0.127 mm) are achievable by many shops and even some online marketplaces, precision tolerances are oftentimes a whole different story. When you require parts with sub 0.005” tolerances (down to +/- 0.0005” (0.0127 mm), it is critical to have a machine shop that can dependably get you the parts you need on-time.
Additionally, with supply chain disruptions and geopolitical tensions continuing to impact manufacturing services worldwide, you are best off finding a precision machining partner in the United States who can reliably deliver tight tolerance parts.
Our precision machine shop is right here in Englewood, Colorado; we can achieve tolerances down to +/- 0.0005” (0.0127mm), and “Customer Service” is our middle name. (Well, it could be!)
But whether you choose Summit CNC or another US-based machine shop, we want you to get exactly what you need from your manufacturing experience. Before placing your next order for tight tolerance parts, ask these four key questions of any machine shop you work with.
Doosan DNM 4500S heavy high-speed machining center
4 Questions to Ask When Sourcing Tight Tolerance Machined Parts
1. Do you use high-speed precision machining centers with advanced lookahead capabilities?
High-speed lookahead enabled to achieve optimal accuracy for tight tolerances and fast machining times
Many machine shops use lightweight CNC machines incapable of delivering both speed and accuracy, so you’ll want to confirm that the equipment a shop uses is advanced enough to meet your needs.
Ideally, the shop should use heavy-duty, rigid mills with superior lookahead, which enables the machining center to self-adjust its feed rates to achieve optimal accuracy on features with tight tolerances.
Our Doosan mills are a great example of this type of machine. Their real-time agility capabilities allow us to leverage their 15,000 RPM spindles with minimal machine vibration. This affords the most efficient machining of your parts while maintaining exacting tolerances.
You benefit from the resulting time and cost savings!
ER Collet (left) compared to Hydraulic Chuck (right)
2. Do you use ER collets or hydraulic chuck tool holders?
A precision machine shop makes an important decision when choosing their method for securing cutting tools. ER collets are fine for drills and taps, but hydraulic chuck tool holders are the optimal solution for end mills.
Hydraulic chucks utilize a sleeve for every diameter of end mill, enabling 100% surface contact with the tool. This stabilizing surface contact is critical when milling at high feed rates because even the slightest vibration of the tool can compromise cutting accuracy.
At Summit CNC, we use hydraulic chuck tool holders on all of our end mills to achieve tight tolerances on even the most challenging features.
3. Do you set tool wear offsets at the machine controller?
Some precision machine shops will claim that tight tolerances are only possible to achieve with brand new tools, but this is not the case. What is true is that each new tool costs the customer money, and the right shop will prefer to save you money—and minimize shop waste!
It’s possible to maintain new-tool precision by leveraging machine tool controllers to offset tool wear. In layman’s terms, this approach involves programming machines to account for the material that wears off a tool during its use. For example, a 0.25” diameter tool that has worn down to 0.245” will still cut to the correct tolerances when tool wear offsets are properly applied.
4. How do you measure critical features?
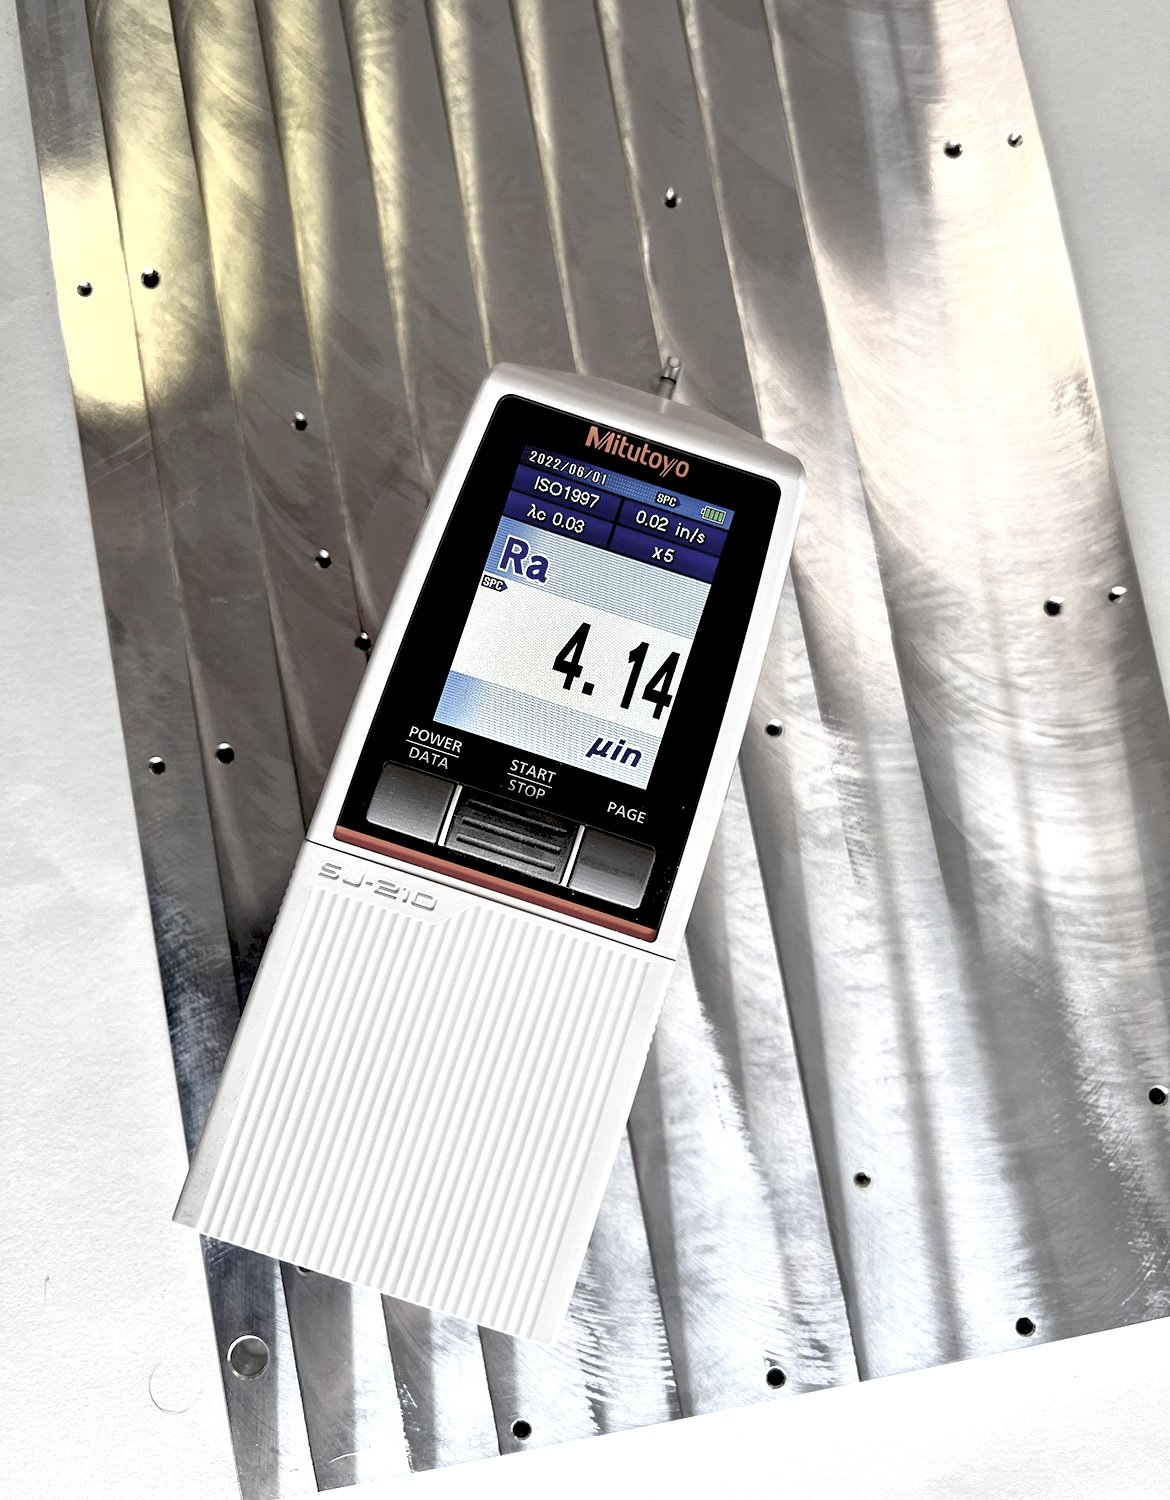
Mitutoyo SJ-210 surface roughness measurement device
It’s essential to evaluate a shop’s approach to quality control, and you can do that by asking how they measure critical features.
At Summit CNC, we measure every critical feature on and off the machine using precision measuring equipment, including the following:
Keyence CMM
Mitutoyo digital micrometers and digital calipers
Class Z gage pins (+/- pins with 0.0001” (0.0025 mm) tolerances)
Renishaw probes
Interapid dial test indicators (+/- 0.0001" (0.0025 mm) range)
Mitutoyo SJ-210 surface roughness measurement device
Careful attention to critical tolerances is always important, but it’s imperative for some customers. One such customer is a world-renowned medical testing device company in Colorado.
Class Z gage pin used to inspect 0.257" diameter thru hole
Summit CNC machines precision holes and slots for one of the company’s devices, and these features must be precise down to +/- 0.0005” (0.0127 mm). During quality control, we test these features using +/- Class Z gage pins to ensure total adherence to specifications. The part will not function if the holes and slots are even slightly out of tolerance, and that’s simply not acceptable on our watch.
We can’t say for sure how other shops measure critical features, but any high-caliber precision machine shop should have an answer for these processes.
Tight Tolerances Done Right
At Summit CNC, we believe we’re your best choice for tight tolerance CNC machined prototypes and low-volume production parts. We’re US-based, ITAR-compliant, and (we’ve been told) pretty darn great to work with.


